Two Ways to Load Data Into Snowflake
In Phase 2 we built five perfectly designed tables — all of them empty. Phase 3 fixes that. We loaded 2,613 rows of realistic car wash data using two different methods: direct SQL inserts for small reference tables, and Snowflake’s COPY INTO command for bulk CSV loading. Here’s exactly how it works and why the distinction matters.
Where We Are in the Series
By the end of Phase 2 we had a fully structured Snowflake environment: two databases, six schemas, five tables, and three roles — all set up correctly and ready to receive data. Every table preview showed ‘Query produced no results.’ That changes today.
Phase 3 is the most satisfying phase so far. There’s something genuinely rewarding about watching data land in a table for the first time — especially data you designed the schema for from scratch. By the end of this post, all five tables are populated and ready for the analytics queries in Phase 4.
 What You’ll Learn in This Post
The four main ways data gets into Snowflake and when to use each one. How to use INSERT for small reference datasets. What a Snowflake Stage is and how COPY INTO works step by step. How to diagnose a common error you’ll hit in the load history query. How to verify your data loaded correctly.
Four Ways to Get Data Into Snowflake
Before writing a single line of SQL, it’s worth understanding the landscape. There isn’t one way to load data into Snowflake — there are four, and the right choice depends entirely on the size of your data and where it’s coming from.
Method | Best For | How It Works | Used In This Phase |
INSERT | Small reference data (< 100 rows) | Write VALUES directly in SQL | Locations (8 rows), Plans (3 rows) |
COPY INTO | Large datasets from files | Stage file → load to table | Members (200), Visits (800), Transactions (1,602) |
Snowpipe | Continuous real-time ingestion | Auto-ingest from cloud storage | Phase 6+ (future) |
Fivetran / Airbyte | Live sync from source systems | Connector pulls from API/DB | Production with real Salesforce |
In this phase we use the first two: INSERT for the small dimension tables, and COPY INTO via a Stage for the three larger CSV files. The bottom two — Snowpipe and Fivetran — are what production pipelines use when data needs to flow continuously from live source systems like Salesforce or a POS API. We’ll touch on those in later phases.
Method 1: INSERT — Loading Reference Data
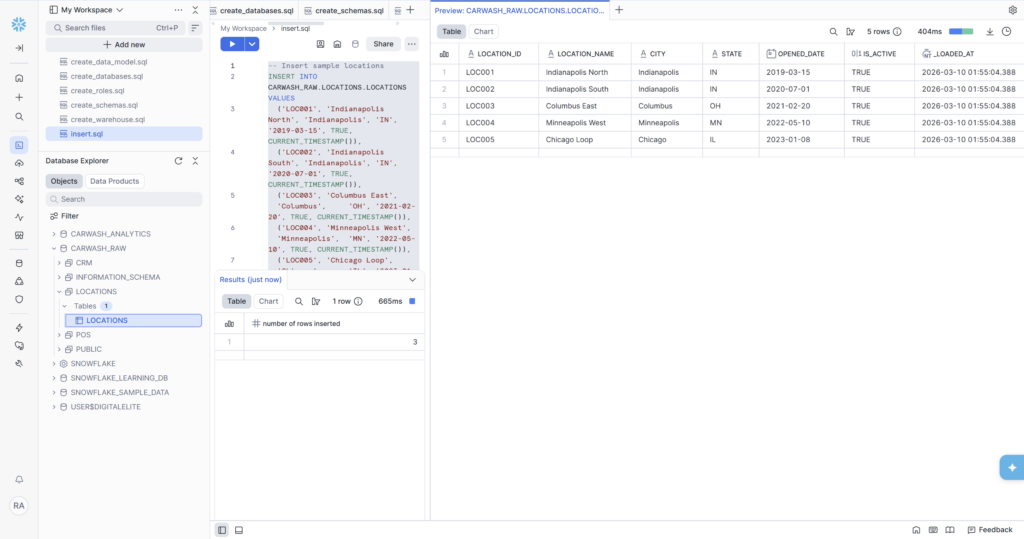
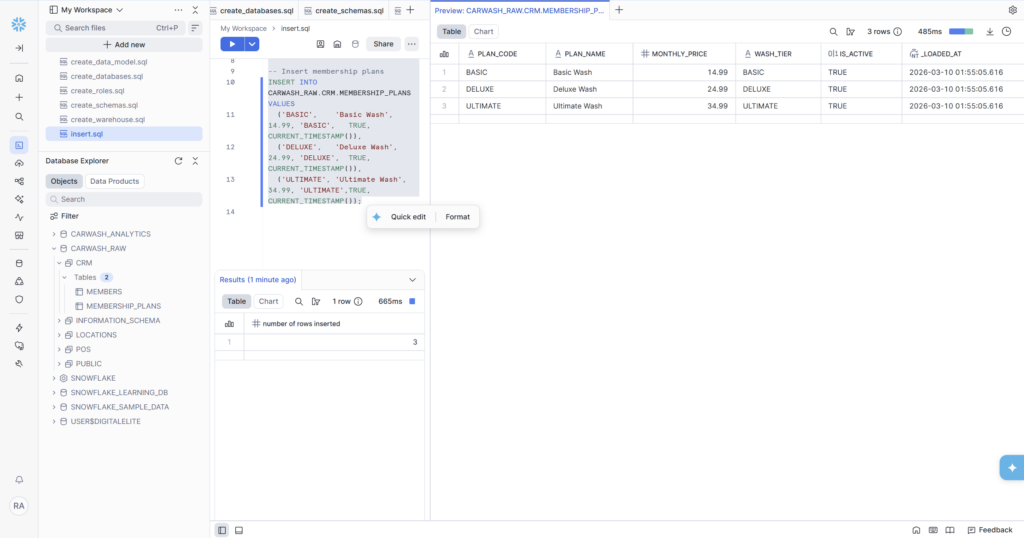
For small, stable datasets that don’t change often, a direct INSERT statement is the simplest and most readable approach. Our LOCATIONS and MEMBERSHIP_PLANS tables are perfect candidates — 8 locations and 3 plans respectively. These won’t grow much, and writing them directly in SQL keeps them in version control alongside the rest of the project.
After running, the table preview shows all 8 rows immediately — real city names, correct state codes, accurate opened dates, and CURRENT_TIMESTAMP() automatically populated the _loaded_at column at run time.
Final Row Counts — Phase 3 Complete
All five tables are loaded. Here’s the complete picture:
| Table | Load Method | Rows Loaded | Schema |
| LOCATIONS | INSERT | 8 | CARWASH_RAW.LOCATIONS |
| MEMBERSHIP_PLANS | INSERT | 3 | CARWASH_RAW.CRM |
| MEMBERS | COPY INTO | 200 | CARWASH_RAW.CRM |
| VISITS | COPY INTO | 800 | CARWASH_RAW.POS |
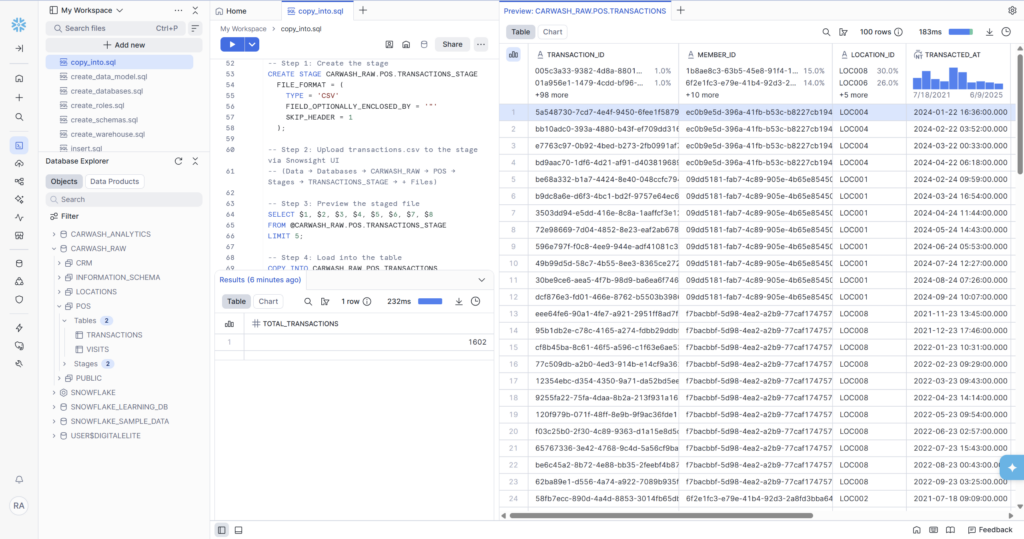
| TRANSACTIONS | COPY INTO | 1,602 | CARWASH_RAW.POS |
2,613 total rows across 5 tables. The data distribution is realistic: the fact tables (VISITS and TRANSACTIONS) are much larger than the dimension tables, which is exactly how real data warehouses look. TRANSACTIONS is the largest because each member generates multiple renewal rows over their membership lifetime.
✅ Phase 3 Deliverables — All Complete
- LOCATIONS loaded — 8 rows via INSERT (8 real US cities across IN, OH, MN, IL, MO, WI)
- MEMBERSHIP_PLANS loaded — 3 rows via INSERT (BASIC $14.99, DELUXE $24.99, ULTIMATE $34.99)
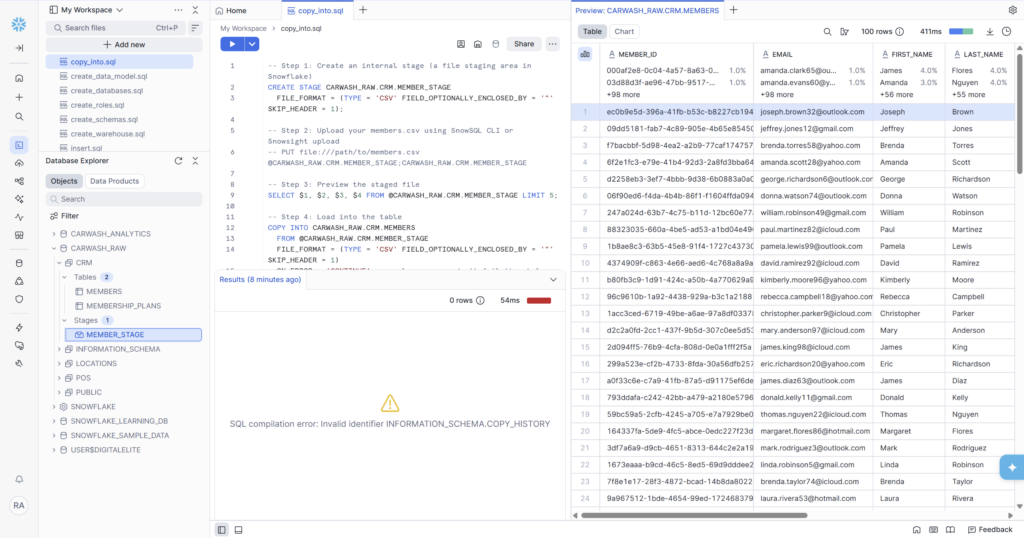
- MEMBERS loaded — 200 rows via COPY INTO (UUID IDs, realistic names, emails, mix of statuses)
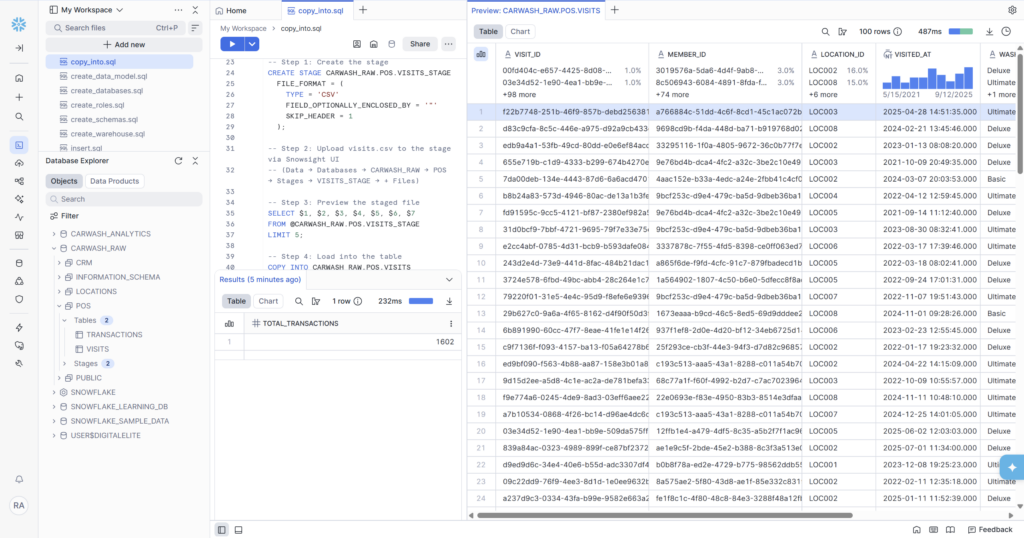
- VISITS loaded — 800 rows via COPY INTO (all 4 channel types, spread across all 8 locations)
- TRANSACTIONS loaded — 1,602 rows via COPY INTO (1,370 renewals, 200 signups, 21 chargebacks, 11 upgrades)
- 3 Stages created: MEMBER_STAGE, VISITS_STAGE, TRANSACTIONS_STAGE
- COPY_HISTORY error documented and fixed with USE DATABASE context
What’s Coming in Phase 4
Now that the data is in, Phase 4 is where it gets interesting. We’ll write four analytical SQL queries that answer real business questions:
• Member count by status — how many ACTIVE vs PAUSED vs CANCELLED members do we have?
• Monthly revenue trend — what does MRR look like month over month, and what’s the growth rate?
• Top locations by visit volume — which sites are busiest and which are underperforming?
• Visit frequency distribution — how often do members actually use their membership?
These queries introduce the SQL patterns that matter most in data engineering: window functions, CTEs, aggregations with HAVING, and LAG() for period-over-period comparisons. All of them run directly in Snowsight — no additional tools needed.
 GitHub Repo
The create_data_model.sql file from this phase is in the /schema folder at github.com/aucampr/snowflake-carwash-analytics. The five CSV files are in /data/csv — feel free to use them in your own Snowflake trial.
Follow Along
This is part of a 6-phase series building a complete Snowflake analytics data warehouse — from blank account to live KPI dashboards — using a car wash membership dataset. Each phase ships as a blog post, and a LinkedIn post.